
Blueprinting is an old and unfortunately almost forgotten monochrome photographic technique. It is very easy to understand without much effort and results in amazing results. I would like to invite you to try it out and offer you a little guide with some sample pictures. I would be happy to know how you got it or what I could do better.
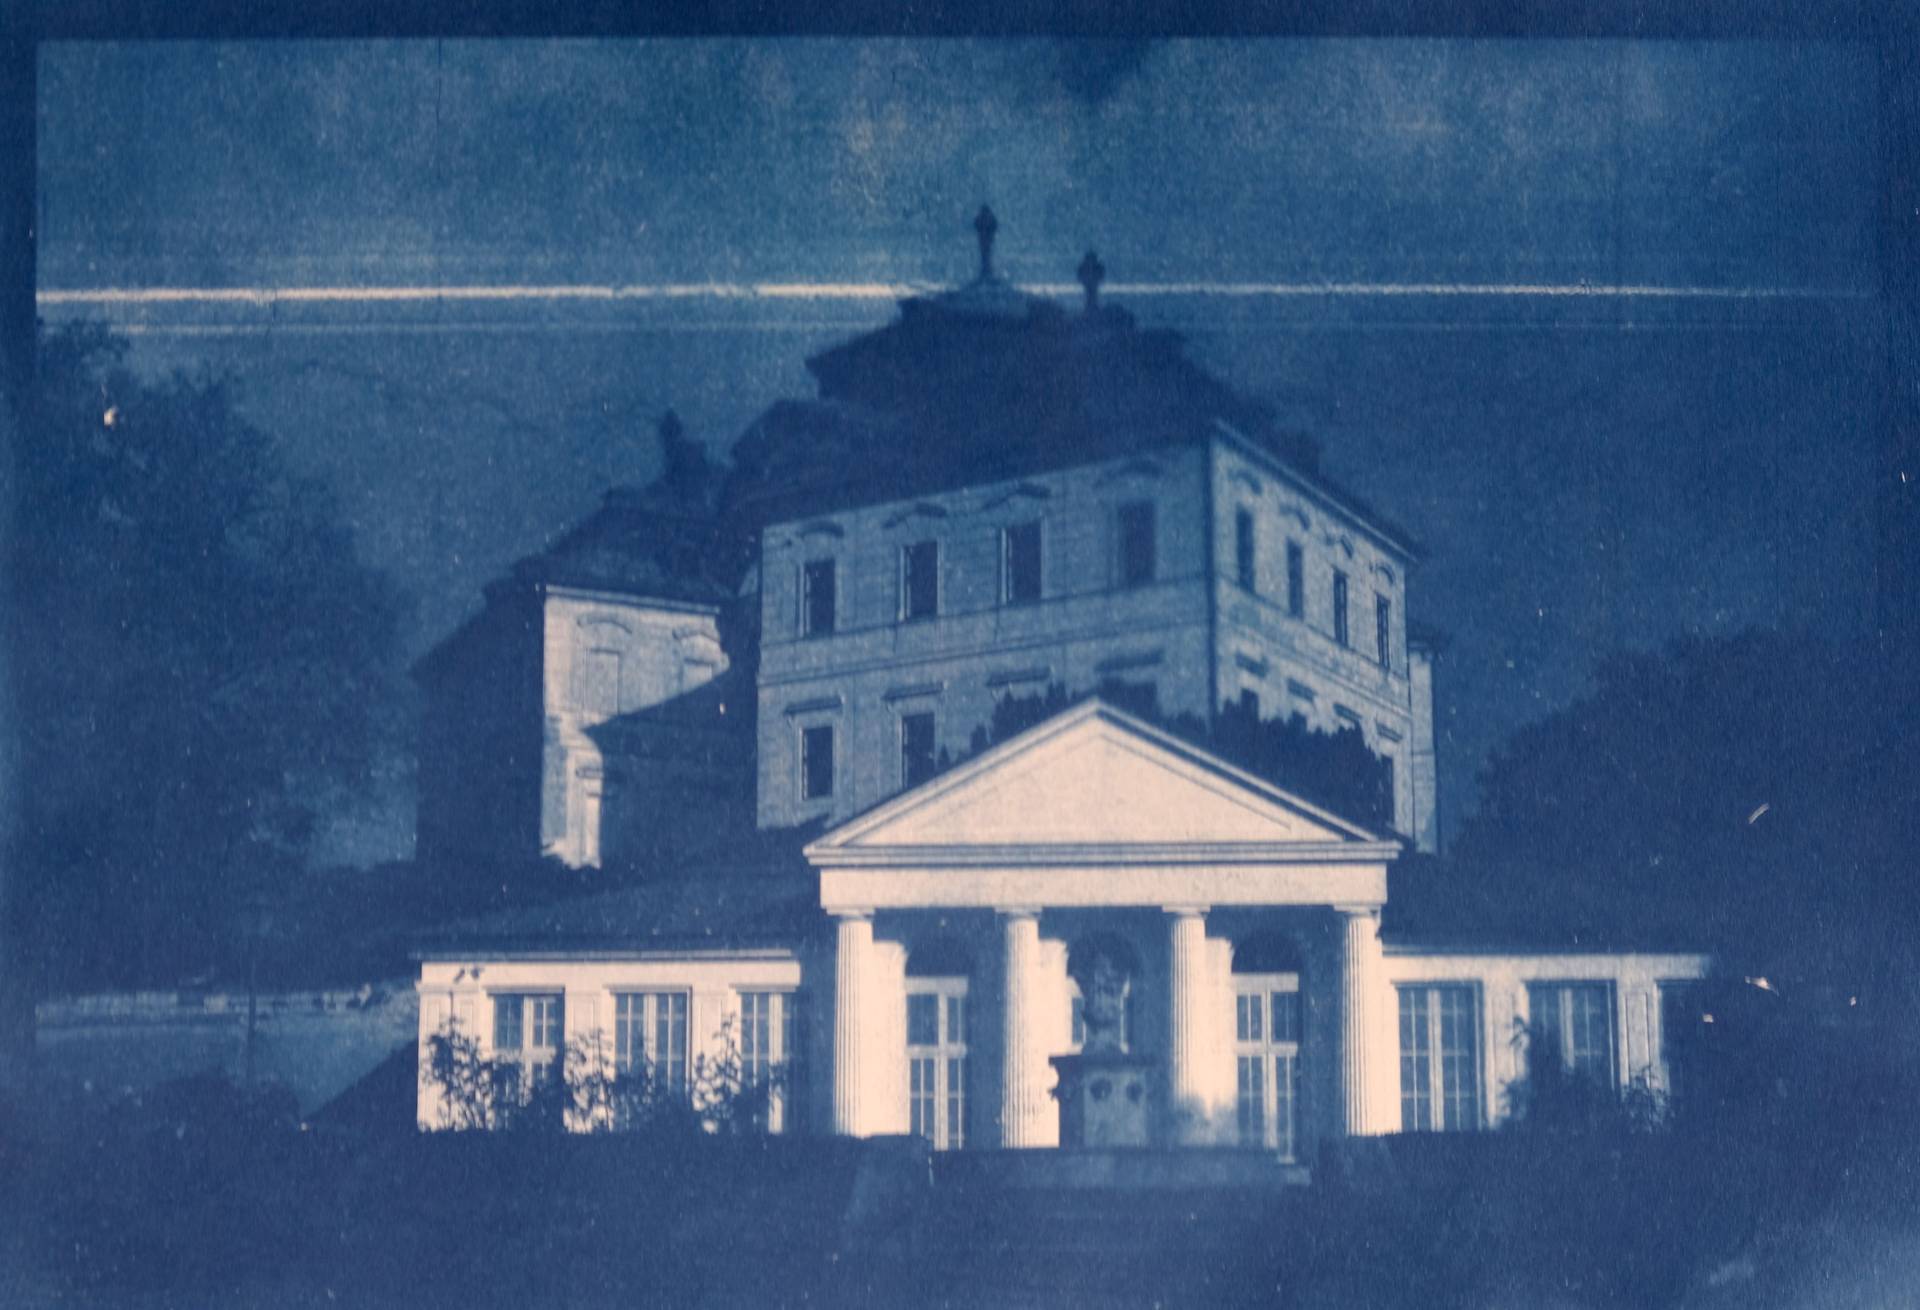
In 1842 the scientist and astronomer Sir John Herschel discovered a process for producing stable images. He found a chemical iron solution in which the iron forms blue crystals ("Prussian blue") when exposed to UV light. The non-crystalline solution can be easily washed out with water. He called his method blueprint or cyanotype. Unlike modern silver gelatin prints the image is created directly in the paper and not just in a layer on the surface.
The photosensitive solution is extremely simple and inexpensive (about € 40 for the quantities given below sufficient for hundreds of images) to produce. Two chemicals are needed for this, which are obtained in large-scale drugstores (in Vienna eg Neuber, Linke Wienzeile 152).
For 1 liter of later dilution you need:
These two raw ingredients are dissolved separately in 1/2 liter of water each. The two solutions can be stored in two separate bottles protected from light and stored for almost any length of time. This approach can be done in daylight.
For coating the paper partial quantities are then taken from the two batches which are mixed in a ratio of 1:1.
The recipe is taken from the recommended book Beyond Monochrome: A Fine Art Printing Workshop / Tony Worobiec and Ray Spence / Fountain Press / ISBN 978-0863433139 taken.
Caution: Chemicals should be handled with care and attention! Corresponding safety instructions can be found in the hazard data sheets.
As support for the later picture paper (but also wood, fabrics etc. are possible) is needed. Basically, almost any type of paper is usable, but since it is wet-coated and later washed in running water, thicker, more valuable paper (eg, 230g / m² oil-based paper or cardboard) is more suitable. It keeps the watering better and dries again without major dislocations.
This paper is then brushed with the mixture described in point 2 (as you are used to from water colors) and dried. The order appears in light green color. Even a non-uniform "color" job can later contribute to great effects. But beware! The mixture of the two solutions of chemicals is already sensitive to light. Therefore the whole process should occur in near darkness (a weak bulb does not hurt yet) happen! Also the "painted" (sensitized) paper may now only be stored in the dark.
Since the image is reversed during the later exposure a (black and white) negative is required. In earlier days Sheet film negatives were used, but today hardly anyone has them.
Therefore, the best way to create the negatives from a high-contrast and not too detailed image with an image editing program of his choice (Gimp as open source software should be mentioned as a possibility).
If one has a color image this is converted in the first step in a picture with grayscale. In a second step it is inverted to a negative. This template is then printed on transparent foil.
Copy shops also usually offer the option of making a copy of your desired image on transparent (overhead) foil. But do not forget, the image must be inverted (negative) during copying (large copiers usually are able to do so).
Negatives on white paper (rather than foil) are not recommended as the paper does not let pass through much UV light.
Pictures with clear contrast gradations are best suited, fine gray gradients are only roughly reproduced.
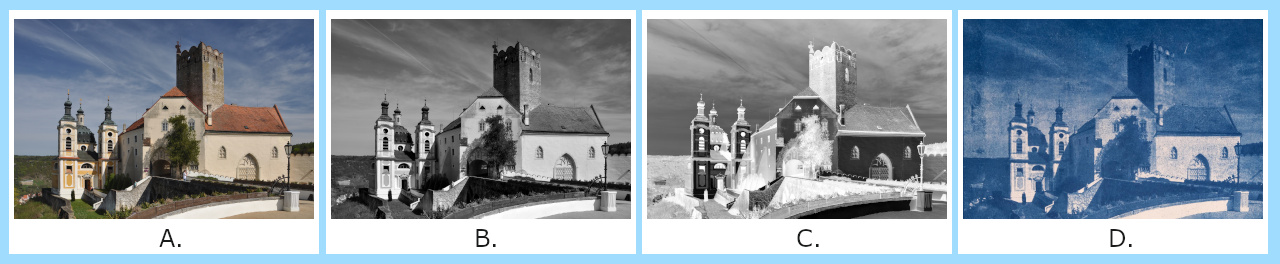
A. Original colour image
B. Greyscale image
C. Negative
D. Cyanotype
Other exciting option are photograms: just take a (flat) object and make an "impression" of it (eg from keys, sheets, silhouettes, drawings on transparent covers).
The exposure takes place by means of UV light. The sunlight or a very strong facial tanner (solarium) are sufficient.
The negative is placed on the photosensitive paper and then exposed to UV light. The bright spots in the negative begin to discolour soon. The color change goes from the original green over a dark blue-green towards brown. If the black (or darkest) negative parts in the picture already discolour clearly, the paper is sufficiently exposed. It is hardly necessary to be afraid of too long an exposure, the picture is brightened considerably during the following watering.
Guideline: On a bright sunny day the exposure will take between 5 and 10 minutes.
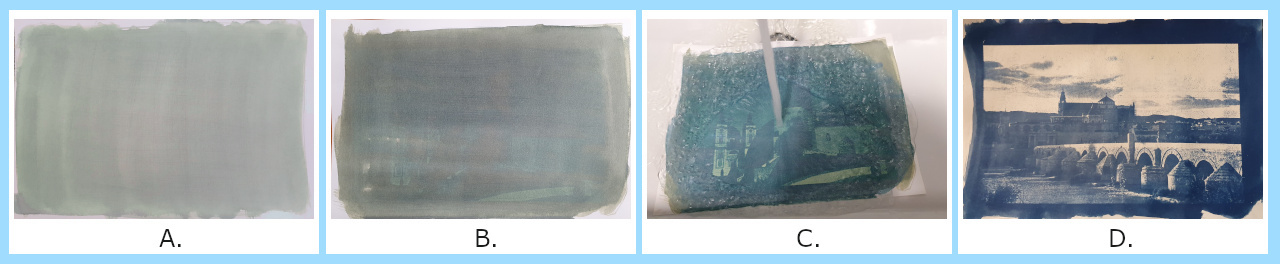
A. Unexposed sensitized paper
B. In sunlight exposed paper
C. Washing
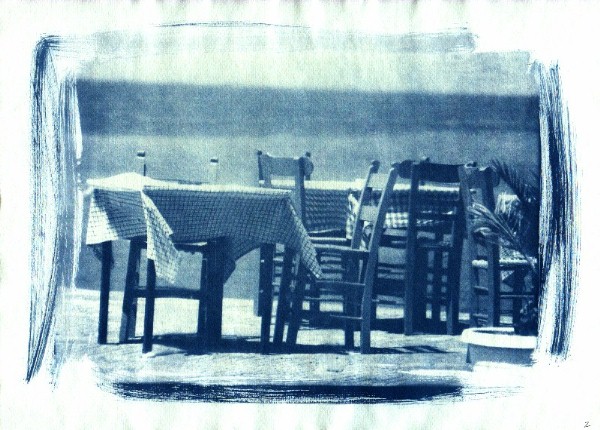
D. Finished cyanotype
Instead of the necessary chemical development with activators and subsequent image fixation in the case of silver gelatine images, cyanotypes only need washing under running tap water.
The picture is held in the water jet until all green and brown tones are gone (no more green, all white spots are pure white!) and a purely blue image is left. Then leave it for drying. If there are forming greenish pools on the picture that is ready to dry, not enough water was given and you should rinse a bit more.
If the paper becomes wavy, it can be helped with an applied glass plate (eg from an old picture frame).
What happens in the paper:
The non-water-soluble blue iron(III) salt crystals remain in the paper while the green iron(II) salts are washed out.
Have fun trying!
Hier noch einige Verweise zu anderen Cyanotypie-Seiten:
I am not a chemist and this is not necessary for this simple and therefore promising technology. I just enjoy photography, whether it's contemporary or trying out old techniques.
Name: Herbert Frank
Post: A-1020 Wien, Hofenedergasse 2/14
Mail: herbert.frank[at]liakada.net
News from me can be found on www.liakada.net.